


Looking at his empty white wall in the bedroom, I found it to be the perfect place for the so-called "wall art" to be on it. Flat graphics with depth effect. Looking through the available models on the thingiverse,I found a lot of great designs. I especially recommend you review those from the user – unpredictablelab. I was the first to choose an astronaut model:

However, there was one problem. The models are too small for such a graphic to decorate the wall in the right way. The model can of course be enlarged, but here again we are limited by our printer working field.
It would be useful, so such a model cut into smaller parts. Looking for information on the web about how to do it in an easy, fast and fun way, I did not find anything that would suit my needs.
I decided to experiment on my own using the free tinkercad tool. The result of my experiments is the following instruction:
- We export to tinkercad a model of interest to us, scaling to the desired size. I enlarged the model 5 times:

- We change the height of the model to 2 mm:

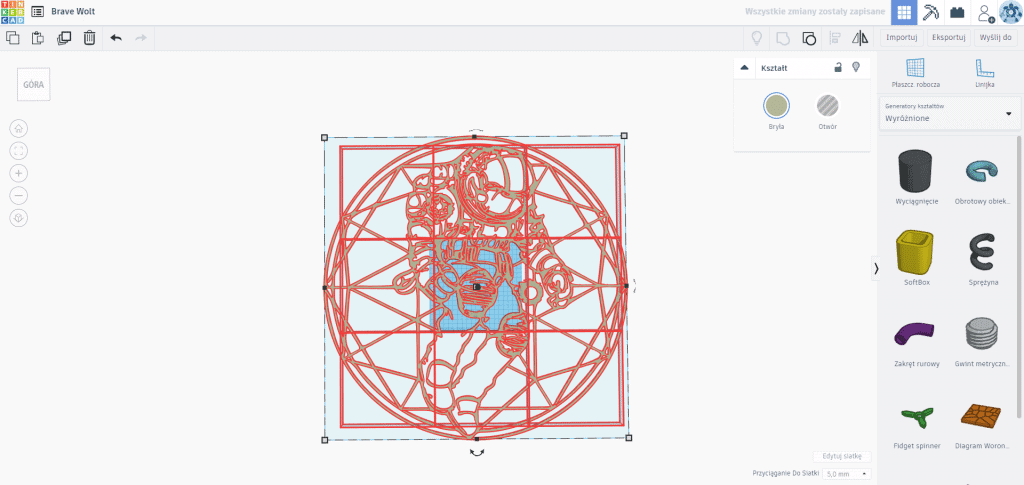
- In turn, from the menu on the right we select: Shape Generator – Highlighted – SoftBox and set the following parameters (for the working field Prussia MK3S):
- aperture
- Wym. X 200,
- Wym. Y 200,
- Wall 0.1,
- Outer radius 0.

- Now we copy our box several times, positioning side by side so that the adjacent walls are covered exactly. In my case, I needed 9 such squares:

- We move the obtained grid to the model and group with the model:
- In this way, we obtained a model with small spaces between the individual squares. Now export it and import it into Prus Slicer. In turn, we use the functionality "Split into separate models" in the top menu bar:

- We print the resulting parts one by one. Then we will just have fun in laying the resulting puzzles:

The end result is as follows:


This "fun" I liked so much that the next "wall arty" are already in print 🙂
